Connect using the simulator
The CLI provides a software implementation of Cat Tracker for testing purposes. It allows the verification of the cloud configuration. This feature is also used for testing Bifravst using Continuous Integration .
To connect to a device and control the device using the simulator, complete the following steps:
Create certificates for the device
Connect to the device
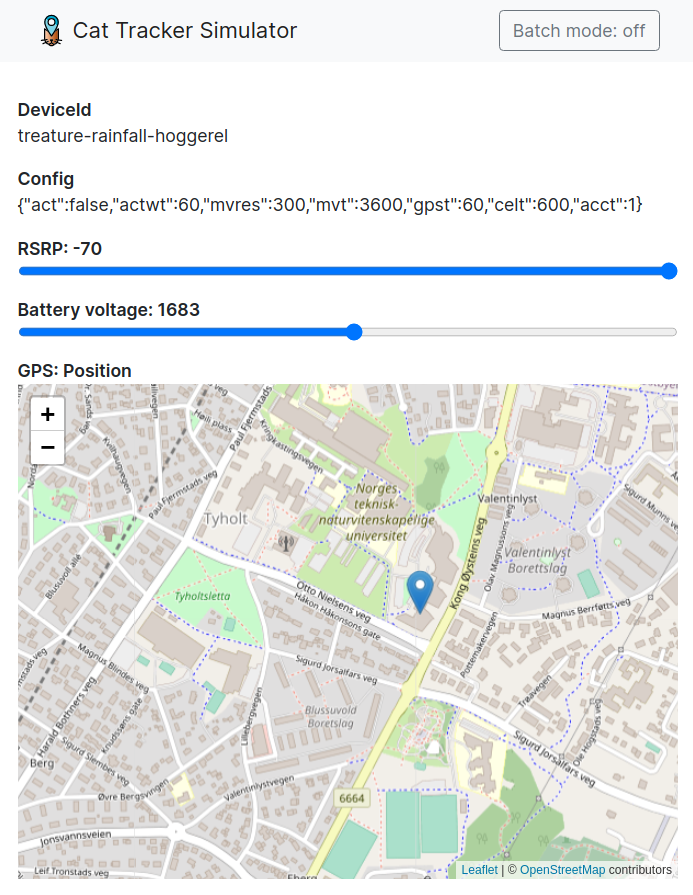
Use the device simulator web application to control the device
Running the simulator
To create certificates for a simulated device, run the following command:
node create-device-cert
As the next step, you can run a simulated device using the generated certificate by running the following command:
node cli connect "<id of your device>"
Note
The device simulator will print a link to the device simulator web application. For the link to work, either enable Continuous Deployment, or manually deploy the device simulator web application.
Using the device simulator web application
The device-ui project provides a browser-based UI to control the simulated device.

Device simulator web application
Clone the project and install dependencies
Clone the latest version of the device-ui project and install the dependencies:
git clone https://github.com/bifravst/device-ui.git bifravst-device-ui
cd bifravst-device-ui
npm ci
Run the device simulator web application
You can run the device simulator web application by using the following command:
npm run
After executing the above command, copy the connection string printed from node cli connect "<id of your device>" (For example, ?endpoint=http%3A%2F%2Flocalhost%3A23719) and append it to the browser address (for example, http://localhost:8080/?endpoint=http%3A%2F%2Flocalhost%3A23719).
Deploying the device simulator web application
To build and setup the device simulator web application to the storage account created when setting up Bifravst in your Azure account, run the following commands:
cd ../bifravst-azure
export $(cd ../bifravst-azure && node cli device-ui-config | xargs)
export APP_NAME=${APP_NAME:-bifravst}
cd ../bifravst-device-ui
export SNOWPACK_PUBLIC_VERSION=`git describe --tags $(git rev-list --tags --max-count=1)`

npm run build

export DEVICE_UI_STORAGE_CONNECTION_STRING=`az storage account show-connection-string --name ${APP_NAME}deviceui --query 'connectionString'`
az storage blob service-properties update --connection-string ${DEVICE_UI_STORAGE_CONNECTION_STRING} --account-name ${APP_NAME}deviceui --static-website --404-document index.html --index-document index.html
az storage blob upload-batch --connection-string ${DEVICE_UI_STORAGE_CONNECTION_STRING} --account-name ${APP_NAME}deviceui -s ./build -d '$web'

echo "Done. Now open $SNOWPACK_PUBLIC_DEVICE_UI_BASE_URL to view the web app."
After executing the commands, you can open the domain name printed in SNOWPACK_PUBLIC_DEVICE_UI_BASE_URL to view the device simulator web application.